THE SMA HANDBOOK ARCHIVE
The Importance of Using Gages
When I was a kid, I used to buy special effects magazines like Starlog and Cinemagic. Whenever there was a photo of a Stop-Motion setup, there would be the animator, the puppet on a miniature set and usually next to the puppet would be some foreign device with a pointer on it. I had no idea what it was used for. So when I started making my own animated films I would just move the clay character around, never knowing where he was the previous frame. If he fell down, it was anyone's guess to where he was before falling over. I started using gages in 1987 on the Gumby TV Series. I bought 2 Starrett Surface Gages, small and large. I still use these same gages today. They are my favorite tools next to Frame Grabbers. On The Nightmare Before Christmas, I had to animate Jack Skellington in the graveyard after his sleigh crashes. His Santa suit was torn into pieces. All these pieces as well as Jack himself had to be animated. Definitely one of the most challenging shots I've ever done. I used all kinds of gages and a Frame Grabber to keep track of everything.
Shooting the Pillsbury Doughboy commercials in 1989 was the first time I used a Video Frame Grabber and it changed everything. Now I could compare the frame I was working on to the 2 previous frames. 2 was the maximum frame storage at that time. But that was enough to determine if the puppet's movements were the way I wanted them. Today you can buy Frame Grabbers that store the whole shot so you can actually watch the animation as you are working on it. The Video Lunchbox available from Animation Toolworks is such a device. I own one and it is a great product. But I usually use my surface gages along with the Grabber. Why? Partly out of habit and partly because I like to know where the puppet is in real space, not just on the TV monitor. I also find it saves time by cutting down on the time it takes to keep checking the grabber and making adjustments to the puppet.
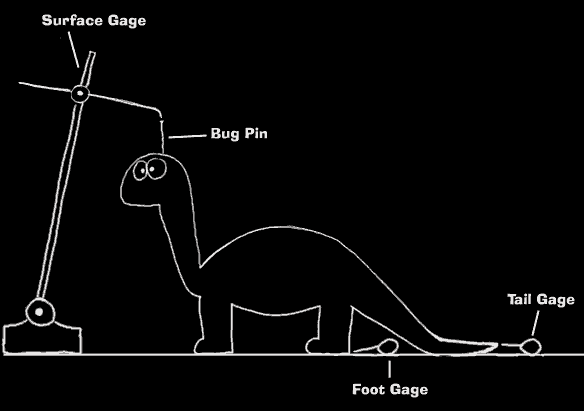
So let me explain how I use a gage. It's simple really. Say you are animating a 4-legged dinosaur walking. You have Frame 1 posed and ready so you shoot the first frame. Before touching the puppet again, place the gages at the gage points on your puppet. See the illustration below:

The head is a very good place to gage the puppet from. I attach a bug pin to the puppet first. This keeps the puppet from getting damaged by the gage point while you are posing it and it gives you a definite point from which to gage from. Bug pins are used to mount insects for display and they are very thin. They can stick into a foam or clay puppet without leaving any damage. If the character's head is solid, you can use Fun Tak (a reusable adhesive substance from DAP Products) and stick some on the puppets head and put a pin in it. Then get your gage and align the pointer to the head of the pin. I also make little gages for things like feet and tails. You can make them out of T-Pins and Fun Tak. Ok, now that the gages are in place you are ready to move your puppet.
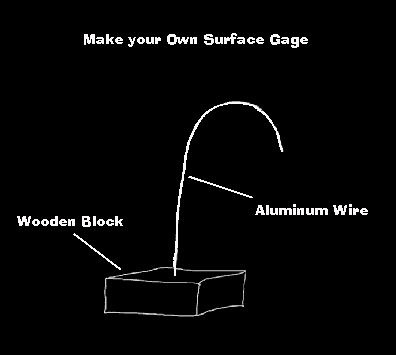
If you want the puppet to travel a quarter inch per frame, its easy to see if you're moving too far or not far enough by checking your gages. Why do I gage the feet and tail? I gage feet if they are in motion. The feet that are tied-down don't need to be. Its especially easy for a tail to get messed up while you are moving the puppet and end up looking very jerky when the shot is played back. Gaging it keeps this from happening. Once you are happy with the puppet's position for Frame 2, you can remove all the gages and shoot your second frame. Repeat these steps every frame until you are finished. If you can't afford a Surface Gage, you can build one easily. Just get some Aluminum Wire from the Art Supply Store and a block of wood. Attach the wire to the wood and you have a poseable surface gage. I've used gages like these and they work just fine.

Frame Grabbers store your shot so that you can compare your previous frame(s) with your current working or live frame. By flipping back and forth between these frames, you can examine the motion. They have other benefits such as if a puppet or prop falls over, you can put it back in the exact position by checking your previous frames. Also, if a light goes out and you didn't see it happen, you might notice it on the grabber. Nowadays, there are several frame grabbing options. Many of them can be installed onto your computer.