THE SMA HANDBOOK ARCHIVE
Building a Wire Armature for Your Puppet
Armatures are the support for your new creation. Basically it is the skeleton underneath the clay which will allow you to move your character in small increments for animation. The items you will need are, 1/16th inch aluminum armature wire, 1/8 inch wooden dowel rods, steel craft wire, a scrap piece of wood, two small wood screws and a hot glue gun if you can get one.
The puppets, being made of soft pliable clay, must be handled very carefully to avoid distorting them. In fact, to achieve good results, clay animators will usually wear clean gloves (to avoid transferring dirt from their hands onto the clay) and frequently have to remove fingerprints and tool marks from handling before shooting a frame. In fact, we often caution beginners (who think claymation is going to be EASY) that it involves some degree of re-sculpting between frames! But of course, it’s not hard to do simple claymation if you don’t care about these niceties - just don’t expect California Raisin results with nothing but a lump of clay!
The tools you will need are a power drill, a screwdriver, and a pair of wire cutters.
The first step in creating your armature is to take your spool of aluminum armature wire, and stretch a four foot piece out, and fold it in half so you have two straight parallel pieces of wire. Place the two ends of wire into the chuck of your drill bit, while you hold the other end of the wire under a chair leg.
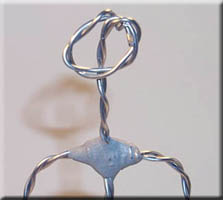
Then start the drill and twist the wire until it looks like the wire in the picture. The reason for this is because it makes the wire twice as strong, and also less likely to cause problems if one half the wire breaks during animation.


The next step is to draw out your armature on paper, in the size of the character you would like to animate. Take the wire and bend it to the shapes you would like for arms and legs. Usually it is made of two large "U" shaped pieces.
One long piece which acts as the two legs, and hip section, and one which runs from one hand, through the shoulders, to the other hand, and is joined together by a mid section. After you have your armature laid out, you need to make sections that do not bend. If you do not add these sections, your character will look like his arms and legs are made from spaghetti.
The way to add hard sections is to think about where you would like specific body parts to have joints. Your wrists, elbows, knees, and waist are all flexible areas, and they would be likewise on your character. So as an example, on an armature I am creating, I take a section of dowel rod, and place it next to my characters arm. I figure that I need two hard sections, the upper and lower arm. I take a pen and mark the length of dowel rod I need for each section, and cut the pieces with my wire cutters.
To attach these two dowels, you cut two small pieces of steel craft wire, and tie the dowels onto the aluminum wire, near both tips of the dowel rod. If you can, hot glue over these as well to give it more strength.
Feet on an armature are the hardest part to create. You can either make two loops for feet, and screw the armature to a block of wood, or you can make feet using thin aluminum blocks with holes which have been drilled, tapped, and can allow the aluminum armature wire ankles to be attached through a separate hole. Then use what is called tie downs.
The tie down consists of a rod which can screw into the tapped hole in the foot block, and a thumb screw. You drill a hole in the floor of your set, place the foot over the hole, then from under the set you push the threaded rod through the hole, screw it into the threaded hole in the foot, and use the thumb screw which is on the threaded rod to tighten the foot down to the set floor. It sounds complex, but with a little craftsmanship, can be done with a few hand tools.
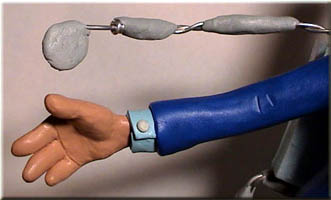
The last step is applying clay to your armature. It is important to melt the clay onto the armature so it will stick to it, and not fall off during animation. I do this using a torch, but can be done using the double boiler to melt the clay. You melt your clay, and drip it onto the armature until you have a thin coating of clay over every part of the armature. You then wait for the clay to cool completely, and then apply your un melted clay on top of it.
You can also sculpt the inner parts of your character using scrap clay, and then coat the outside of it with nice clean new clay. That is a method Will Vinton had done to save on custom colors they mixed for characters clothes, and is good for recycling clay that will not be used.